
Kootek Rustic Woodland Cake Decorating Guide
Kootek Rustic Woodland Cake Decorating Guide
@cakeandcuddleco
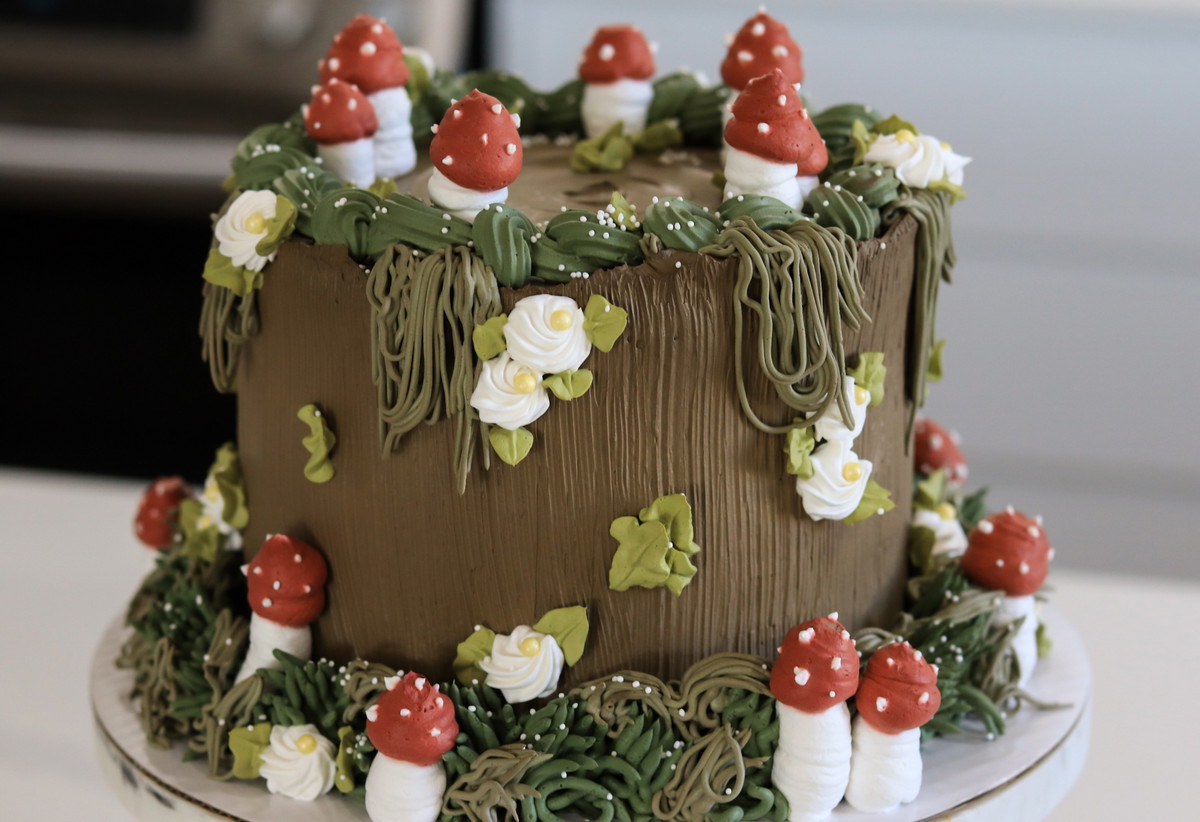
This one's for all the fairy forest lovers! Everything about this cake was inspired by mossy textures, mushrooms, and that cozy woodland feel and I decorated it using tools from Kootek's 158-piece Cake Decorating Kit. It has a ton of variety, and I ended up using quite a few of the tips and extras from it to bring this whole look together.
Tools used
S18 – Large grass (bottom)
K49 – Smaller grass (bottom & hanging moss)
K36 – Shell border (top)
K41 – Mushrooms
K47 – Small rosette flowers
K43 – Small leaves for flowers
Ingredients
- Whipped cream
Directions
Starting with the Base
I started by covering the cake in whipped cream, of course.
Then I used the spatula from the decorating kit to smooth it out and give the top a soft spiral texture. For the sides, I grabbed a pastry brush and added rough strokes to make it look like tree bark. It gave me the perfect tree stump base to build on.
Piping the Details
From there, I used several piping tips that are included in the kit:
Tip S18 – This is one of the Russian tips, and I used it to pipe large tufts of grass all around the bottom of the cake.
Tip K49 – A smaller grass tip, perfect for layering over the larger grass at the base and also for the mossy strands hanging down from the top. I just kind of let them fall naturally for a wild, overgrown look.
Tip K36 – I used this one to pipe the green side-shell border on top of the cake. It's simple but framed everything really nicely.
Mushrooms & Flowers
Next came one of my favorite parts, the mushrooms!
I used Tip K41 to pipe them directly onto the cake. I did the white stem first, then changed colors for the red tops. I added little dots on the mushrooms too, just to give that classic toadstool look.
Tip K47 – to pipe the white rosette flowers scattered throughout the cake.
Tip K43 – to add the small leaves around the flowers.
Final Touches
To finish it off, I sprinkled some tiny white nonpareils across the top and around the base. They looked like little forest pebbles or mushrooms popping through the moss. It was the perfect final detail.
- Choosing a selection results in a full page refresh.